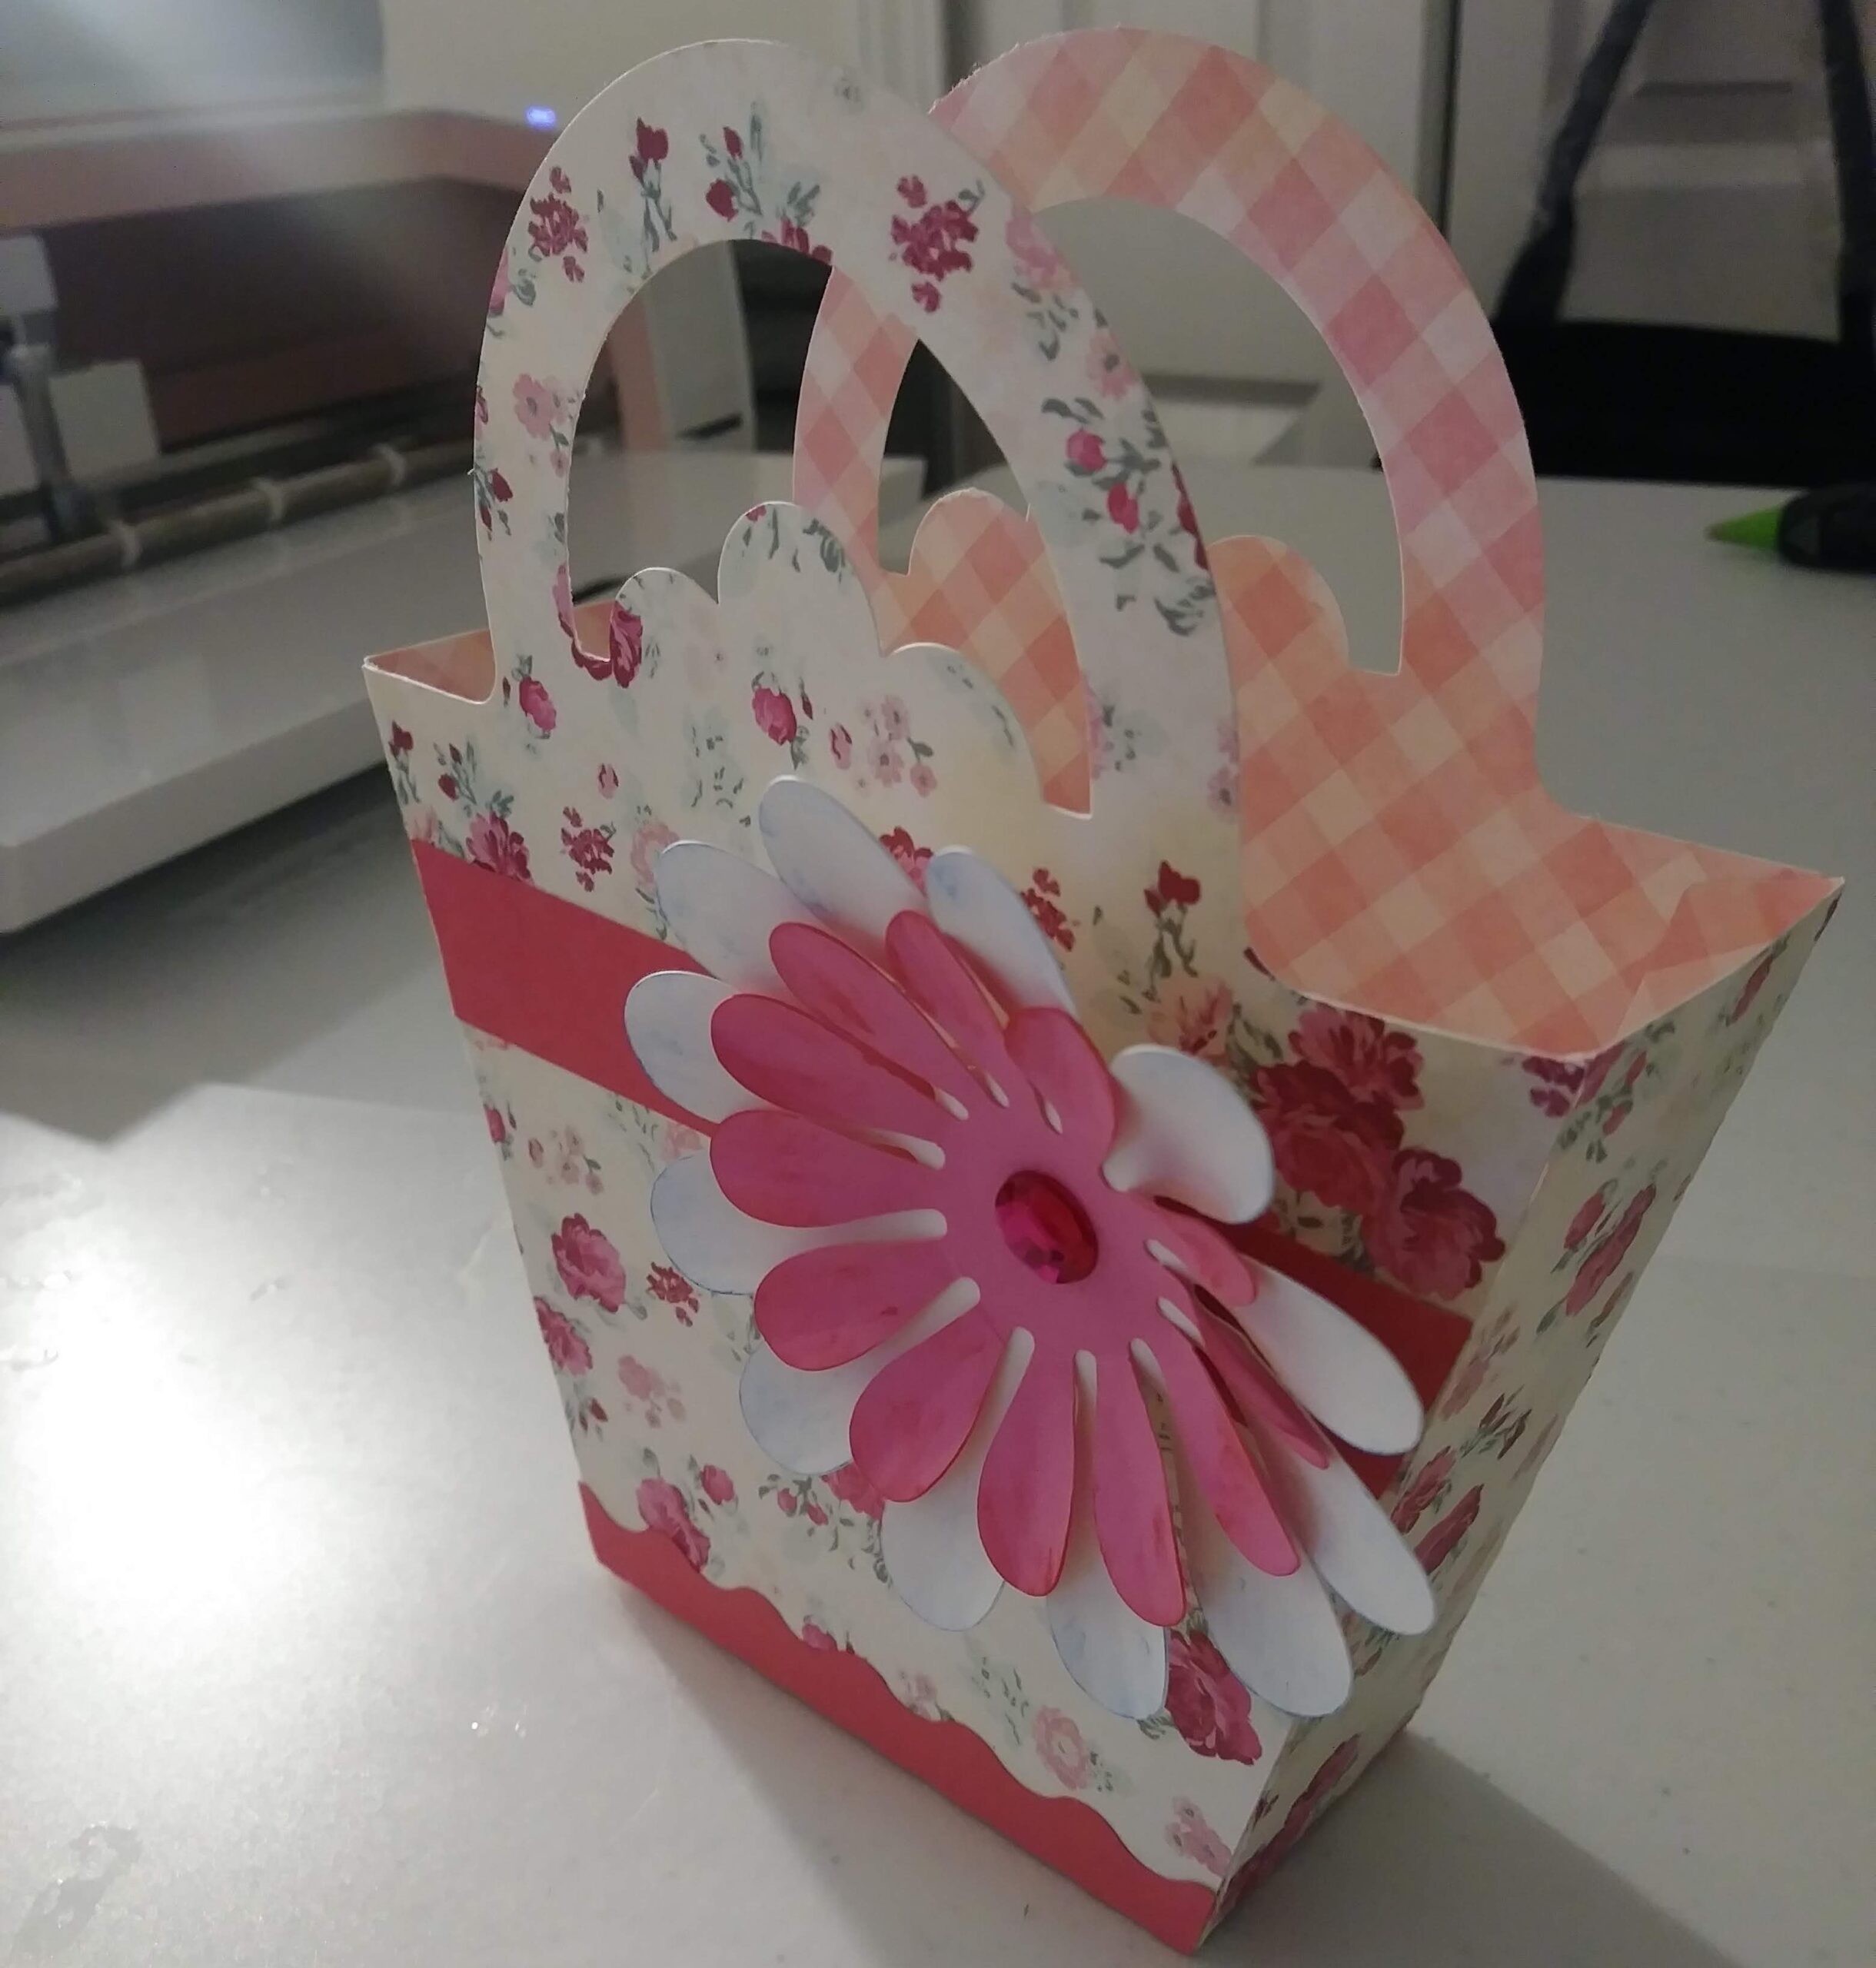
For my next adventure I decided to try my hand at making Mini Daisy Tote, I’m not liking the Aleene’s Tacky Glue, it tends to be clumpy and doesn’t stick as good as I thought it would. I’m in the process of trying to get hold of Art Glitter glue as I’ve heard that its a fantastic glue to work with. I haven’t tried using my glue gun as of yet on any paper items, I’m trying but I’m sure it would have worked better for the flower and embellishments. Special thanks to Dreaming Tree for their wonderful SVG file to make this cute little treat bag, I think its adorable. I’m sure as I progress, I will make more of these and get much better at them. I placed my daisy to one side but they had their daisy centered.
Supplies:
- 1) 12″ x 12″ Double sided patterned Cardstock, (Bag Template)
- 1) 8″ x 11.7″ Solid White Cardstock, (Large Outer Daisy)
- 1) 8″ x 11.7″ Medium Pink Cardstock, (Inner Daisy, Strip, Base)
- Rhinestone Fuschia Embellishment
- Glue
- SVG Files from The Dreaming Tree .
Notes: If you have any questions about how to access the files for this from Dreaming tree, I’ll be happy to help get you to the right place. They also have wonderful tutorials to help piece these cute totes together. Enjoy making your tote and let me know how it turns out.
Mistakes: Again I suck at gluing, the inside is really bad and you can see all the glue lines… The pink strip is crooked.. And my attempt at inking the edges of the flower failed miserably and it looks like I just had ink on my fingers and transferred it! But on the bright side, it is all in one piece, so that’s a great day!!
Originally Posted On my Old Blog January 2019